


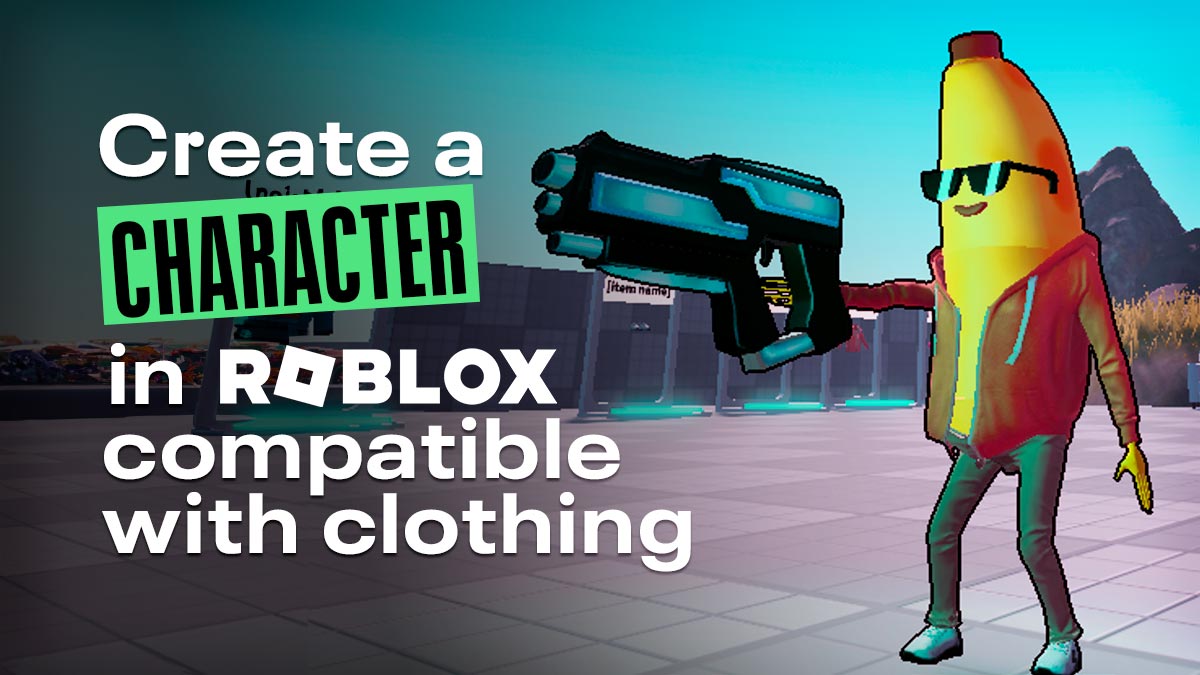
Create a character in Roblox compatible with clothing
With this document, we aim to thoroughly explain the entire process on incorporating a 100 Avatar into Roblox, ensuring full compatibility with Roblox’s R15 rig type and layered clothing
Premise
We want to implement the 100Avatars Round 1 into Roblox to offer it on the marketplace in the future.
Mission
With this document, we aim to thoroughly explain the entire process on incorporating a 100 Avatar into Roblox, ensuring full compatibility with Roblox’s R15 rig type and layered clothing. This enables us to dress our characters with clothing available from the marketplace.
Resources
- An avatar
- Maya
- Blender
- Roblox Studio
- Rig template from Roblox Documentation
- Cage template from Roblox Documentation
Development
Step 1: transforming VRM into .fbx
We will start by converting our VRM file into a .fbx format. To achieve this, we need to import our VRM into Blender.
Before exporting to .fbx, it’s essential to merge the vertices to prevent potential issues during movement later on.
Once we have converted our VRM into a .fbx, we can proceed with the process of adapting our character for Roblox.
Step 2: separating the model
The following steps can be performed in either Maya or Blender. Feel free to choose the program you are most proficient with; we will provide instructions for both.
Regardless of the program chosen, the initial taks is to resize our character to fit the Roblox scale. We recommend setting their height to 6cm since that is the standard height for Roblox models.
Maya
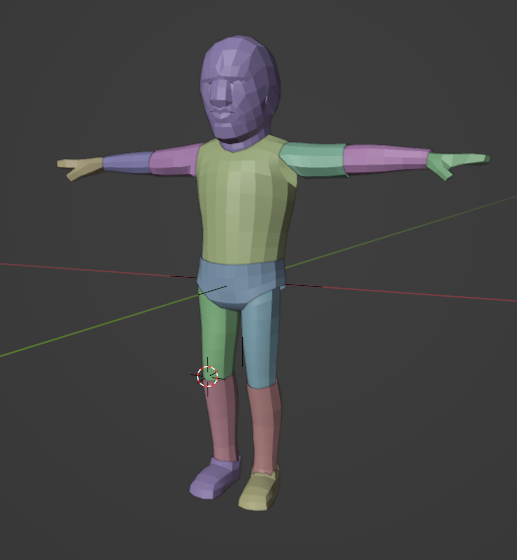
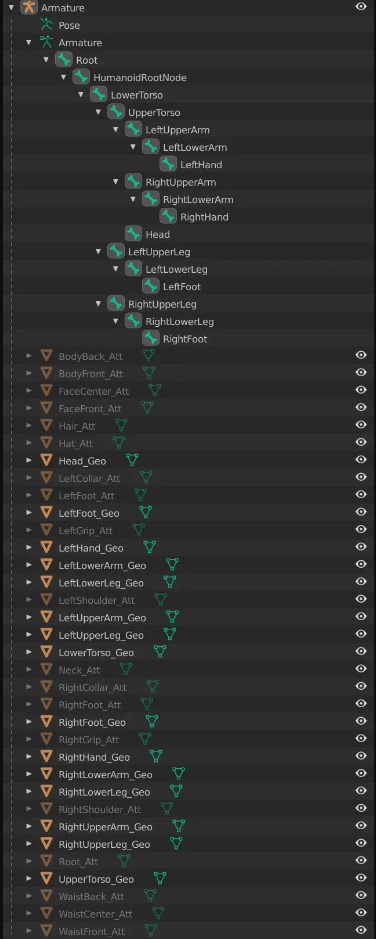
We begin by importing our .fbx into Maya. To ensure compatibility with Roblox’s R15, we need to divide our model into 15 parts and group them within a group named “Geo”.
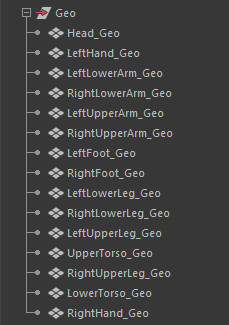
We need to ensure that all the parts are named exactly as displayed for Roblox Studio to recognize them.
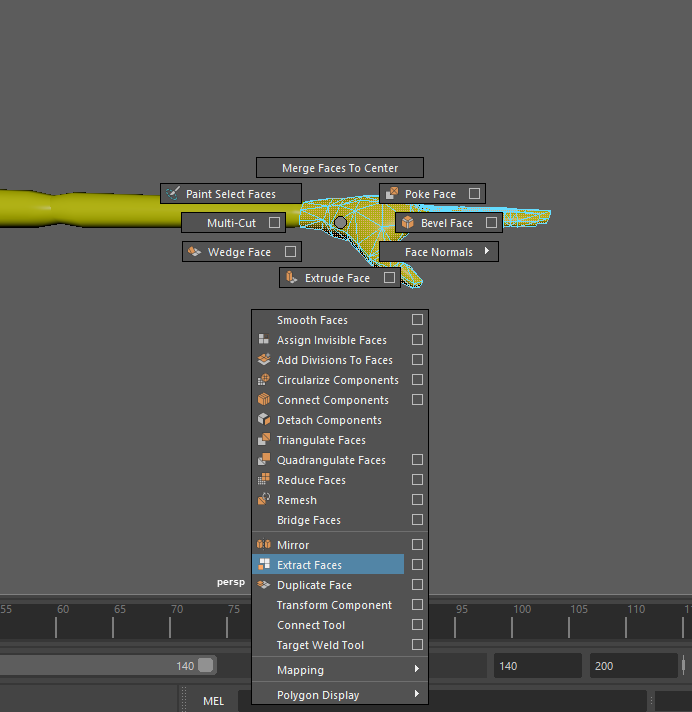
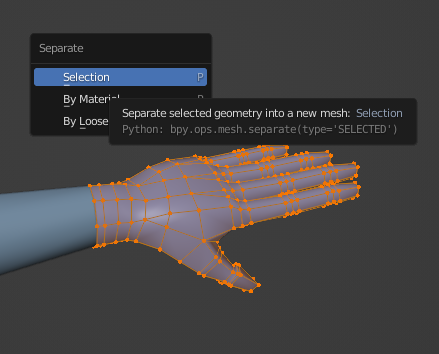
To separate the pieces, we’ll select the faces of each part at the joint and use the “Extract Faces” function.
We will repeat this process until our model is completely separated into all 15 parts.
Blender
We begin by importing our .fbx into Blender. To ensure compatibility with Roblox’s R15, we need to separate our model into 15 parts and group them within a group named “Geo”.
We must ensure that all the parts are named exactly as displayed for Roblox Studio to recognize them.
To separate the pieces, we will need to select the faces of each part at the joint and use the “Extract Faces” function. Press the letter P to separate them:
We will repeat this process until our model is fully separated into all 15 parts.
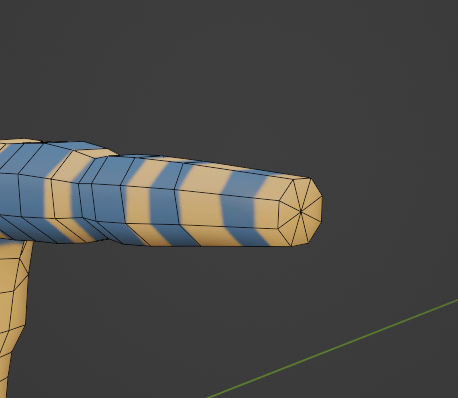
Step 3: sealing each part
Next, we need to seal every part. Since they will be moving independently, we may be able to see into the holes left from separating each piece.
Maya
We will select the edges around the part and extrude them towards the center. Then we will collapse the vertices to the center to seal the hole. Lastly, we will need to correct the UV maps to ensure they fit the textures properly.

We will repeat this process for all 15 parts until everything is sealed. In Roblox Studio, this is referred to as being “WaterTight”.
Blender
We will select the edges around the part and extrude them towards the center. Then, we will collapse the vertices to the center to seal the hole. Lastly, we will need to correct the UV maps to ensure they fit the textures around it.
We will repeat this process for all 15 parts until everything is sealed. In Roblox Studio, this is referred to as being “WaterTight”.
Step 4: body cage
With our main model prepared and separated, we will continue the process by adapting the body cage to our character. The body cage determines where the clothing will go over our character. It is a mesh that should cover the avatar’s body and adapt properly to its shapes to ensure the clothes work well.
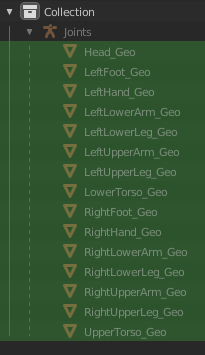
The best way to start is to import the cage file available in the Roblox Documentation to have a starting base that we will need to adapt. The cage should be divided into as many parts as our own model.
Maya
With the cage imported into our program, we can begin selecting each piece to make it surround our character’s mesh.
It is recomended not to edit the mesh by adding or removing edges or vertices. However, if necessary, it can be done scarcely without causing significant issues.
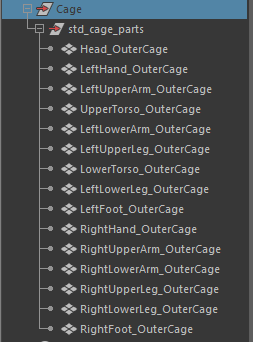
We must ensure to rename every single piece properly so Roblox Studio can recognize the parts and properly organize them as “Wrap targets”.
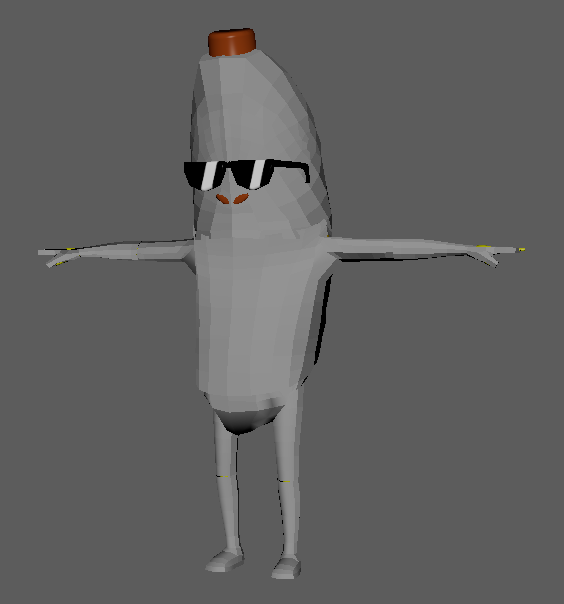
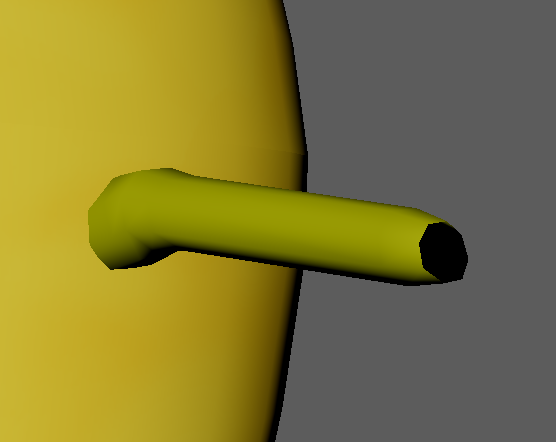
We need to keep certain details in mind to avoid meshing issues. Some layered clothing will override specific parts of the body. For this reason, certain elements can extend outside of the cage. This means that when an item is placed over them, they will disappear, providing better coverage and shaping to our avatar.In this case, I excluded Cool Banana’s sunglases so that they will disappear when another set of glases is placed over him.
Similarly, I left out his stem so that it will disappear whenever hats and hair are placed over his head.
Blender
With the cage imported into our program, we can begin selecting each piece to make it surround our character’s mesh.
It is recomended not to edit the mesh by adding or removing edges or vertices. However, if necessary, it can be done scarcely without causing significant issues.
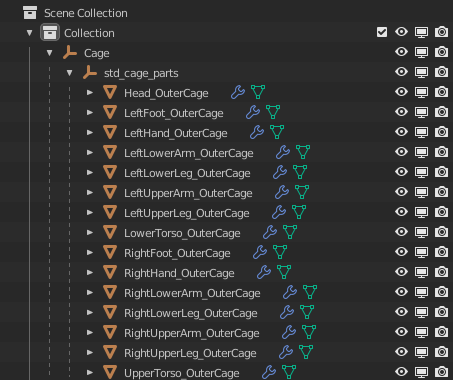
We must make sure to rename every single piece properly so Roblox Studio can recognize the parts and properly organize them as “Wrap targets”.
We will have to keep certain details in mind to avoid meshing issues. Some layered clothing will override specific parts of the body. For this reason, certain elements can extend outside of the cage. This means that when an item is placed over them, they will disappear, providing a better coverage and shaping to our avatar. In this case, I excluded Cool Banana’s sunglases so they will disappear when another set of glasses is placed over him.
Similarly, I left out his stem so it will disappear whenever hats and hair are placed over his head.
Step 5: rigging
To assist with the rigging process and ensure we have all the bones that Roblox Studio can read, we will also import a base rig from the Roblox Documentation. This rig will include anchor points that will guide and determine where certain decorations and clothing will be placed.
Maya
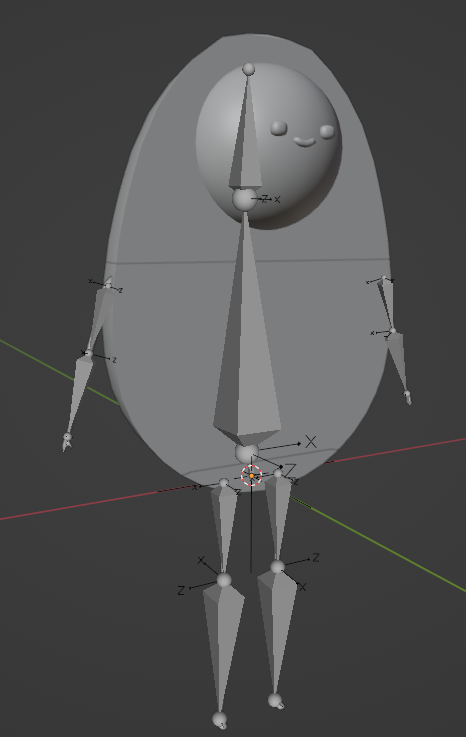
Right after importing the rig, we will want to match each joint into the articulations of our avatar, taking care to keep the lower torso in the same position as the root, which is the origin of the axes (0,0,0).
It is recommended to rig the character in a small “A” pose.
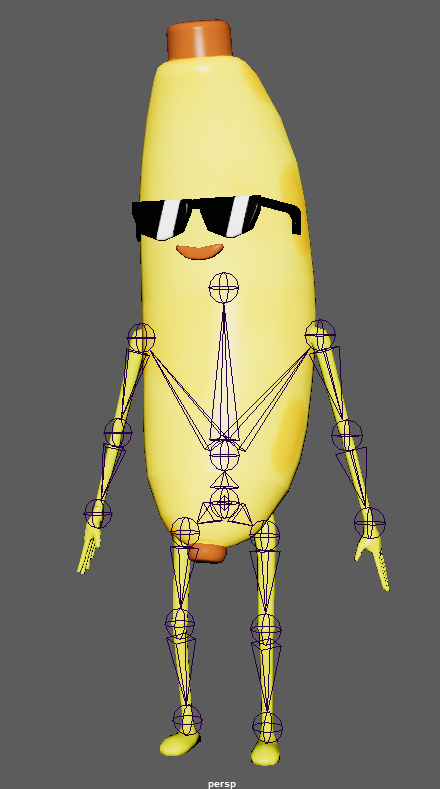
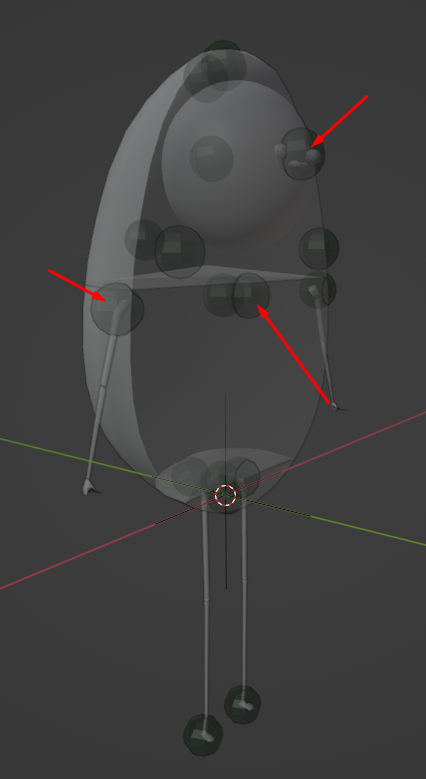
Along with the rig, we will find hidden spheres named to mark certain parts of the body.
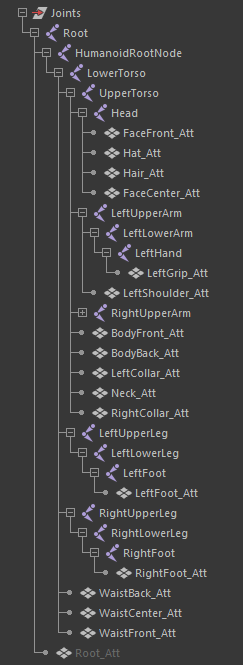
We will need to show these spheres again and move them to match the names they have.
Example: BodyFront_Att will be moved to the front of the body, and so on.
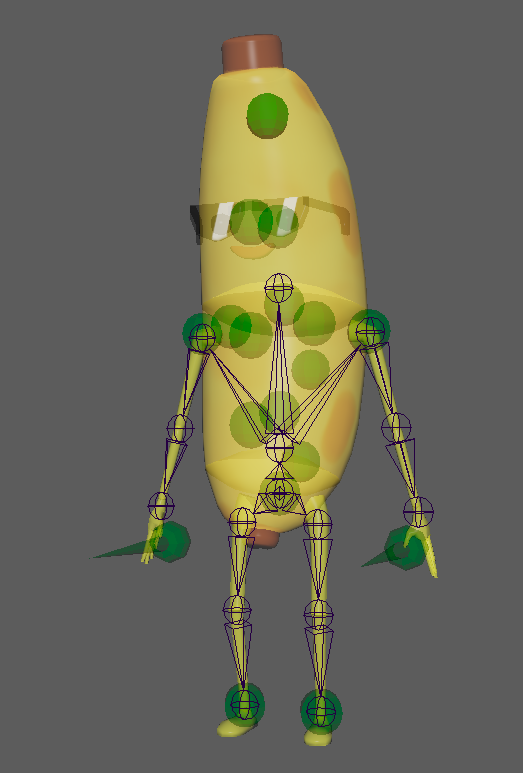
These spheres will become attachments in Roblox, serving as guides for different purposes, including:
- The direction the character is facing.
- Position of the character’s body.
- Direction of the bones.
- Head dimensions for hat placement.
- …
With the attachments placed, we can now proceed to bind the rig to our character.
After entering “Rigging mode” in Maya, we will select the “Root Joint” of the rig and select all of our divided “Geo” parts. Then, we will navigate to Skin > Bind Skin > Open Bind Skin menu to ensure these options:

Then apply them.
At this point, we will find ourselves with a basic rig that we will then have to adjust. To adjust the weights, we have two choices:
- Use the paint weight integrated in Maya.
- Use NGskinTool.
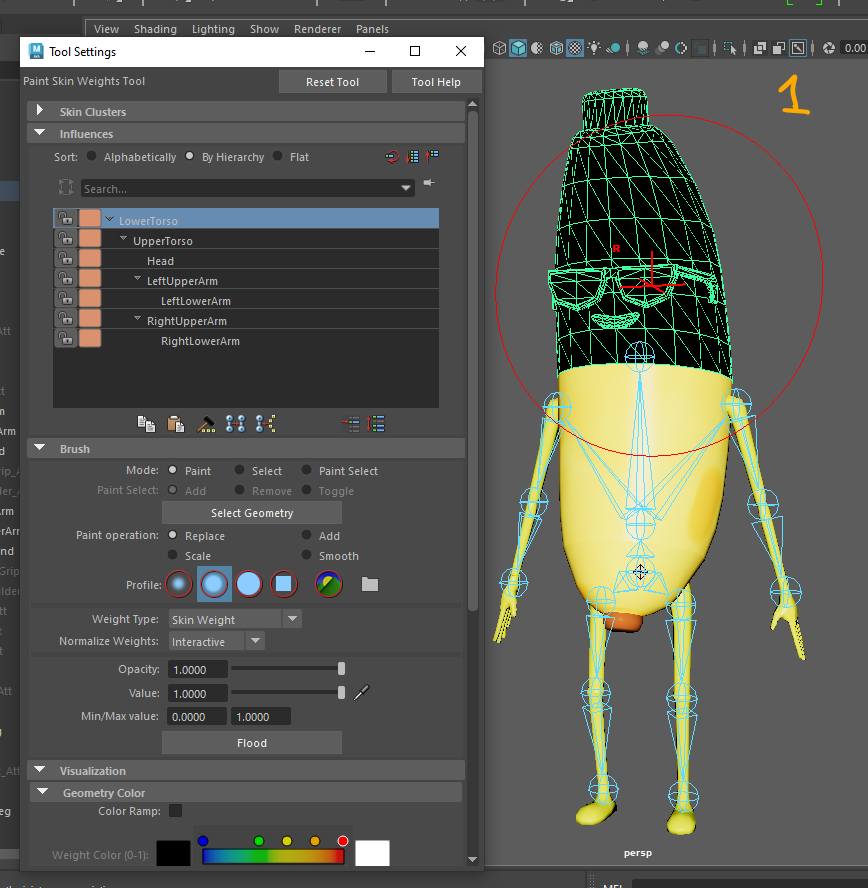

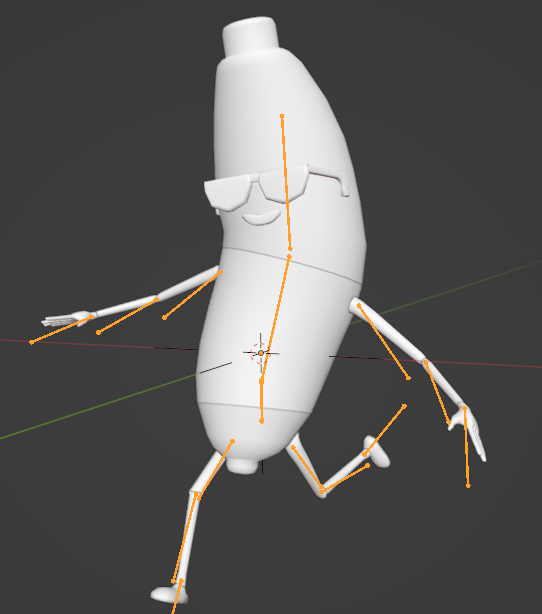
Once finished arranging the weightings, we just have to test the rig by moving the bones and checking that the deformations are consistent and look good.
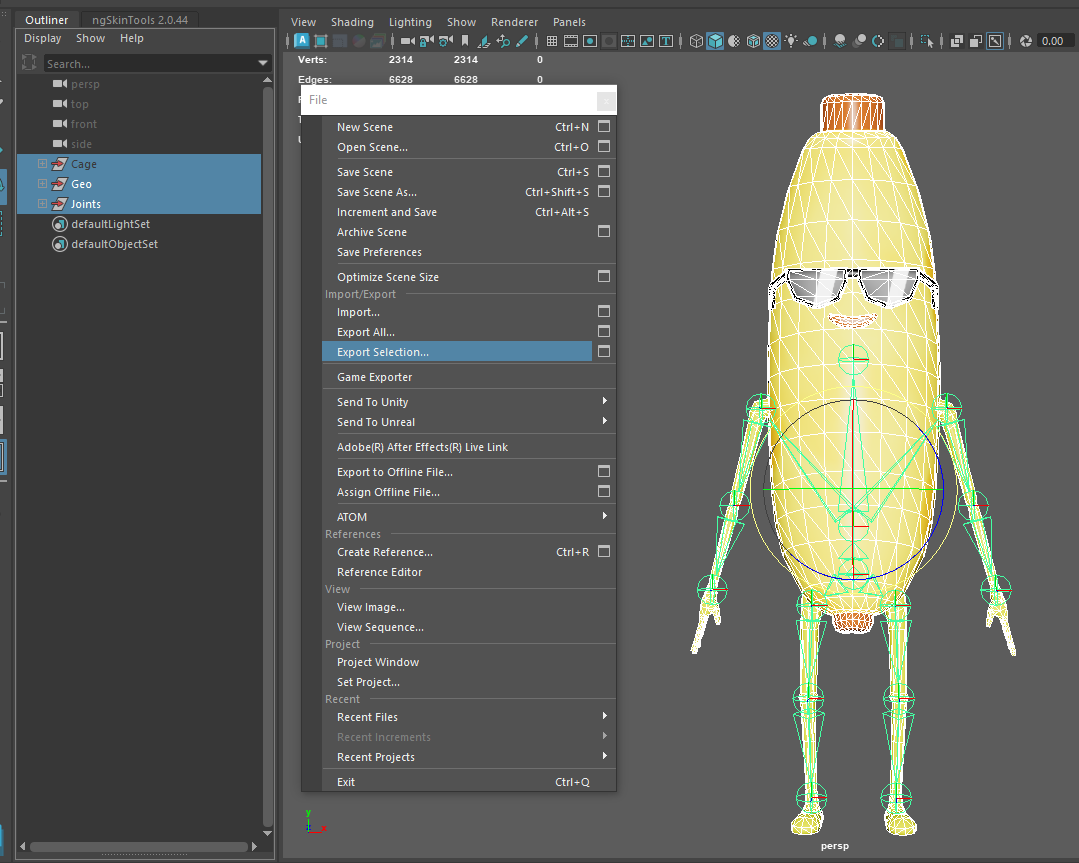
If we are satisfied with the work done, we just have to export to .FBX (making sure to export the geometry, the joints and the cage - the latter without visibility) and import our character into Roblox Studio.
Blender
Right after importing the rig, we will want to match each joint to the articulations of our avatar.
It is recommended to rig the character in a small “A” pose.
We will find hidden spheres named “_Att” in the inspector to mark certain parts of the body.
We will have to show these spheres again and move them to match the name they have.
For example, moving BodyFront_Att to the front of the body, and so on.
These spheres will become attachments in Roblox, serving as guides for different purposes, including:
- Direction the character is facing.
- Position of the character’s body.
- Direction of the bones.
- Head dimensions for hat placement.
- …
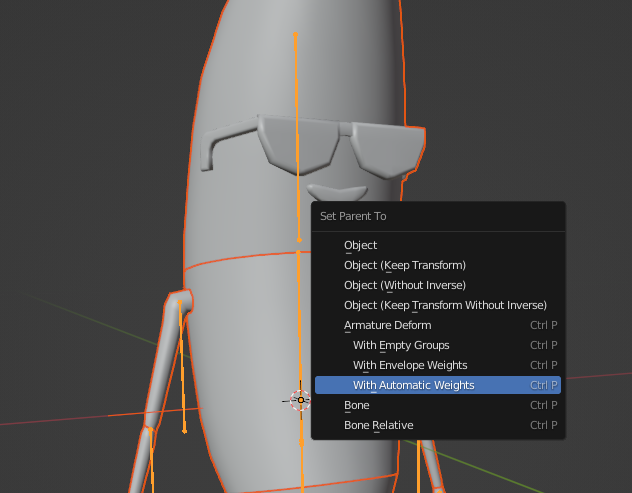
With the attachments placed, we can now proceed to attach the rig to our character.
We choose the sphere to be parented, then we select the Armature (keeping the sphere selected) and switch to pose mode. After that, we choose the bone and press Ctrl + P to establish the parent-child relationship.
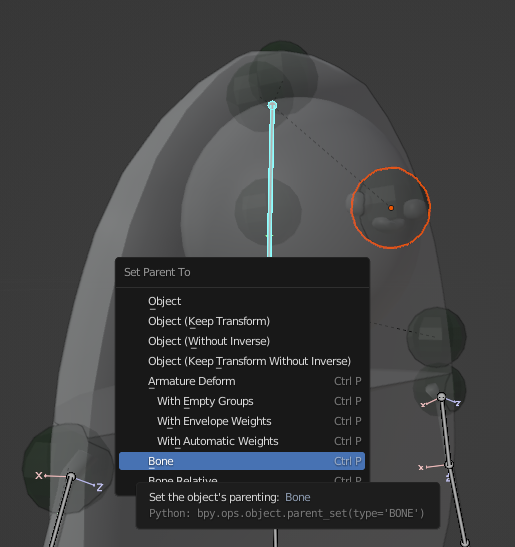
At this point, we will have a basic rig that we need to adjust. To parent the rig, select the body parts, then the rig and press Ctrl + P.
Once the mesh is parented, we must adjust the weights for proper mesh deformation.
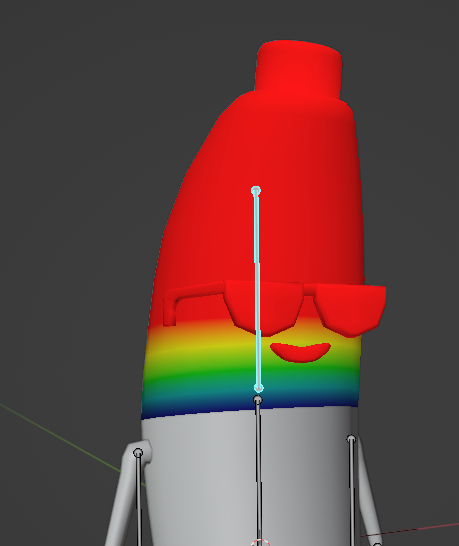
Once finished arranging the weightings, we just have to test the rig by moving the bones and checking that the deformations are consistent and look good.
If we are satisfied with the work done, we just have to export to .FBX (making sure to export the geometry, the joints and the cage - the latter without visibility) and import our character into Roblox Studio.
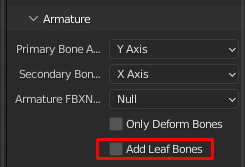
Make sure to select these parameters:
Deselect “Add Leaf Bones” when exporting the FBX.
Step 6: importing into Roblox
We will now import our avatar into Roblox by opening Roblox Studio and going to Import 3D. Select our model and bring it into Roblox.
When importing, we will check and make sure the rig type was recognized. If we did everything right, Roblox will automatically detect the R15 rig type.
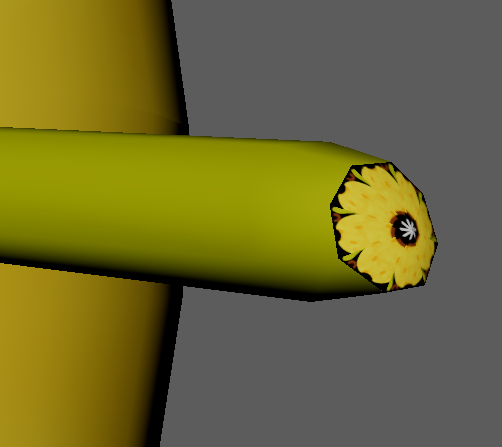
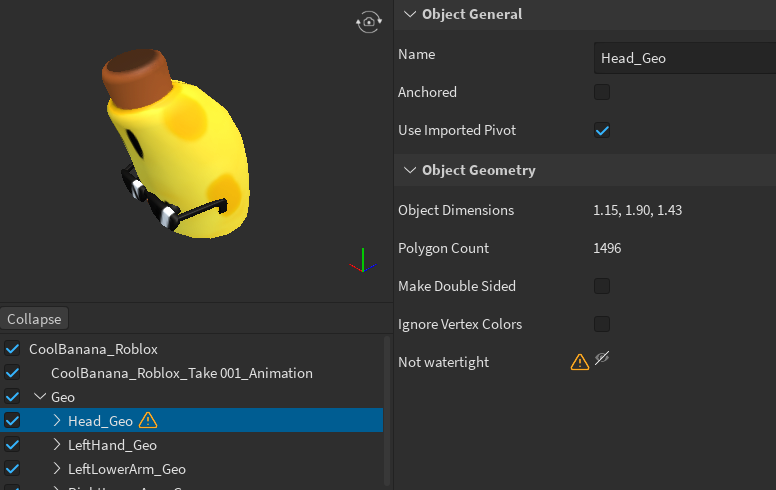
Yellow warnings will inform you if a minor issue has been found in your model. In this case, the step of Cool Banana was not sealed, so it is informing us the head is not “WaterTight”. This will not be a problem since that part of Cool Banana will not be visible at any point.
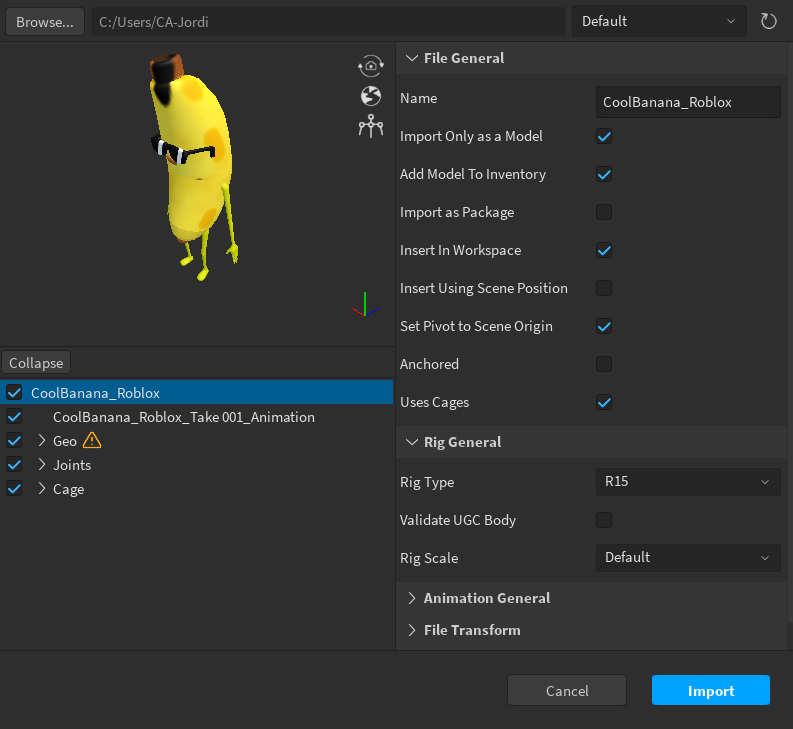
Once we make sure the model is set to the correct options, we can finally import it into Roblox.
Now, we want to go into our model, into the head piece, and delete the face image that Roblox automatically adds to any R15 model.
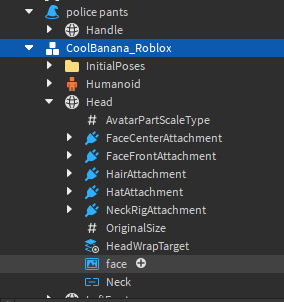
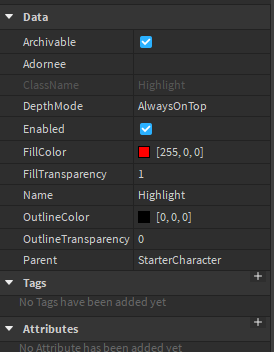
Next, we want to add an attribute called “Highlight” with the following settings.
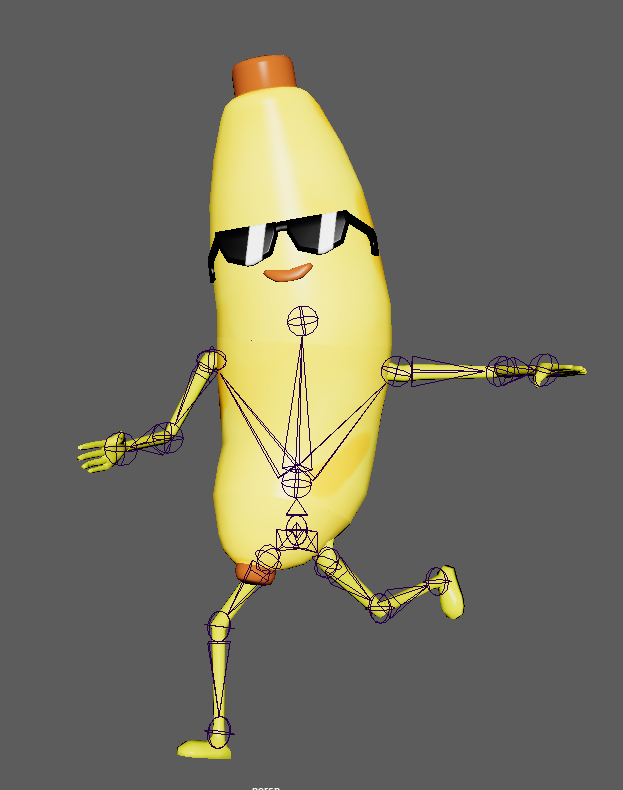
After following all these steps, our avatar should look something like this:
All that is left to do is to change our avatar’s name to “StarterCharacter” and drag it into the StarterPlayer folder.

We finished!! Have fun generating your avatars for Roblox!


